Howdy, today we are going to do the Lamp Sequencer project which takes sound as input and respond to it. It's easy, funny and lovely. Let's get started.


Hardware Required

Hardware
Software Required
- Arduino IDE Download Here
Arduino IDE
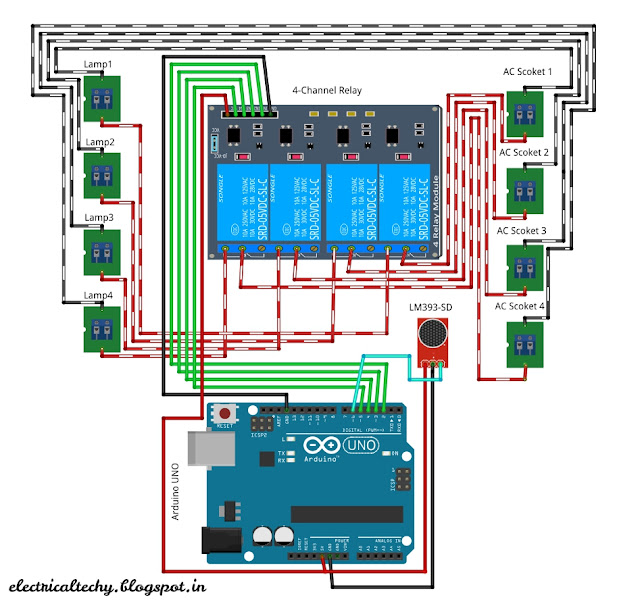
Wiring Diagram
Let connect the peripherals as described in the table below

Pin outs
Note: If you are using 5V relay, the above pin out is acceptable. If you are using (12 or 24)V relay, Use separate (12 or 24)V DC supply and do common ground.
Looks sick 😊

Schematic
Let's code 💪
Uff.. It's time to code our controller board. This is pretty long here due to sequence switching. But don't worry. Copy paste the code in your Arduino IDE. After done it, compile check and upload the program. Ensure you have selected the specified board and port.

IDE-Code
Prototype GIF

GIF
Thank you
Issues, suggestions, complaints: Drop mail